Begin with public browsing
Use public browsing to establish a target before adding paid tools. A clear role, location and experience level make the search easier to evaluate; a broad search for anything remote leaves too many irrelevant decisions.
Start on the official product site, which is separate from this independent guide. Its pricing page links to free browsing and initial matches. Inspect those before deciding whether to pay. The free-access guide explains why a public preview should not be assumed to include every result or tool.
Step 1: define non-negotiable requirements
Write down your target role, acceptable seniority, residence country, work authorization and working-hour constraints. If you require employee status rather than contract work, include that too. Distinguish hard exclusions from preferences so you do not accidentally reject a suitable role over a minor detail.
For example, an analyst in the United Kingdom might accept different industries but require UK employment and overlap with normal daytime hours. Reuse the same specification across sources to compare results and reduce aimless browsing.
Step 2: narrow discovery
Use the available public search and inspect its results. The homepage describes country and time-zone filtering; the pricing page describes salary, visa sponsorship and seniority filters on paid access. Do not assume all filters are included in a public view or that a filter can interpret every employer’s wording perfectly.
If results are too broad, change one criterion at a time. If they are empty, check spelling and separate essential requirements from optional preferences. Do not loosen a legal eligibility requirement merely to make the results list longer. Record uncertainty when a description does not clearly state whether the employer can hire in your location.
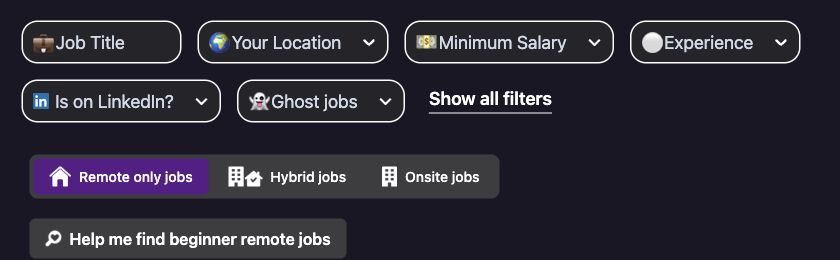
Step 3: verify the employer’s original vacancy
Follow the employer’s own application route and check that the job is still open. Compare the location, schedule, employment arrangement and essential skills with your notes. A copied summary may leave out a restriction found in the full description. Do not spend an hour tailoring an application before checking those exclusions.
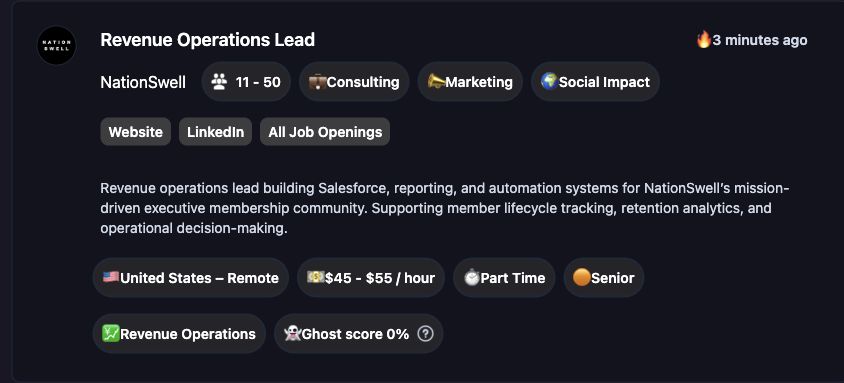
Read the job card from left to right: identify the employer and role, check the stated location and pay, then use the employer’s application route to inspect the full vacancy. The screenshot is a dated interface example; use the current employer listing for your decision.
If the destination is missing, closed or inconsistent, investigate through the company’s known career page or move on. Treat requests for payment to obtain an interview, unusual money transfers or unnecessary sensitive data as reasons to stop and verify. Our jobs guide expands this eligibility and safety check.
Step 4: prepare an accurate application
The paid offer includes resume and cover-letter customization and matching. Compare each suggestion with your real responsibilities and achievements. Delete invented numbers, technologies or credentials rather than accepting them because the wording sounds polished.
Tailoring means selecting relevant evidence, not copying every phrase from a job description. Keep a version of the document you submit so you can prepare consistently if contacted. The feature reference distinguishes an advertised assistance tool from a verified assessment of candidate quality.
Step 5: maintain one tracker
Record the employer, job title, original URL, eligibility notes, date found, date applied and next action. A small spreadsheet is enough. Mark duplicates by original employer posting so the same vacancy discovered through two boards does not become two competing tasks.
Set a review cadence you can maintain. If notifications create more unread work than useful leads, narrow the search or reduce frequency where available. The provider advertises hourly or daily email alerts for saved searches. The tools guide explains how to keep discovery, applications and follow-up in one workflow.
Step 6: review a paid plan deliberately
Before buying, record the actual charge, renewal date and your reason for paying. After using the service, review whether it added suitable opportunities or reduced repeated work. Avoid attributing every reply or rejection to one source, because hiring depends on factors beyond discovery.
If the value is unclear, inspect your cancellation options before renewal. The public terms describe automatic renewal, and refunds require a separate request under the relevant conditions. A repeatable workflow ends with that account responsibility: a search tool can supply leads, but the applicant still controls spending, verification and the quality of each application.
Common questions
Where should I start my search?
Begin on the official public browsing page. Choose a target role and location, then compare the visible requirements with your experience before deciding whether paid access would help.
Which filters matter most?
Start with your residence and work authorization, then seniority, employment type and schedule. Salary and preferred skills can refine the search, but should not override a hard eligibility requirement.
Where do I submit an application?
Follow the application instructions for the specific role and verify the destination through the employer’s known careers page. This independent guide does not collect applications or process them for employers.
What should I record in a job tracker?
Keep the employer, title, original URL, eligibility notes, date found, application status and next action. Store the submitted resume version so you know what the employer received.
How often should I check saved searches?
Choose a routine you can sustain. The paid offer advertises hourly or daily email alerts; daily review may be enough if more frequent notifications leave no time for thoughtful applications.